Scanning a document from a Multi-Function Printer (MFP) to an email address can be accomplished through the touchscreen menu upon logging in. This page will offer information on how to scan a document to yourself and to other email addresses.
Scanning to Yourself
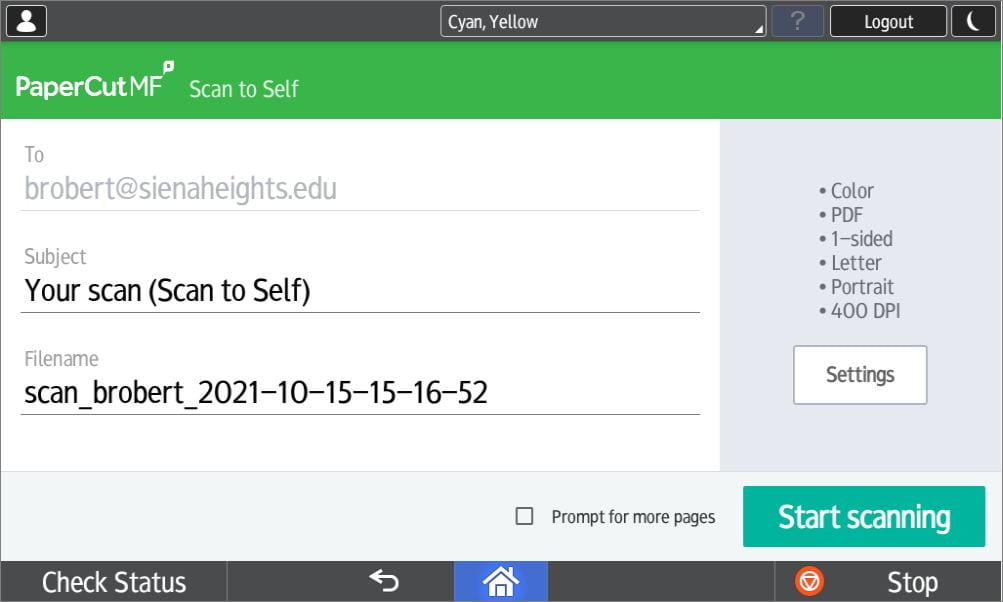
The easiest way to accomplish scanning to the email address associated with your account is to use the “Scan” feature in the menu and select “Scan to Self”. This will allow for basic configuration of the scanned document before it sends to your email.
From the scanning screen, you can specify a custom file name and file type. The file name entered will be the name of the file attached to an email sent to your personal SHU email address after scanning. The file type will allow you to select between PDF, Word, and JPEG (image). For most use cases, PDF is the preferred file type for scanned documents, but the other options are available.
Once settings are setup as needed, prepare the document for scanning, and tap the OK button to begin. Once the document has successfully scanned, it may take up to 5 minutes depending on the file size for an email to arrive to your email inbox with the document attached.
Scanning Features
To change the document settings, tap the “Settings” button on the right-side of the screen. This will bring up all settings that can be modified. These settings include color mode, document type (PDF, Word, JPEG), 1/2 Sided Document, paper size, landscape/portrait mode, and DPI settings. The default settings offer the best compatibility and quality of document scanning, but they can be modified if needed.
These features are only available for the Scan to Self feature. When scanning to others via the device functions, the menu has its own menu and features associated with that function.

Scanning to Others
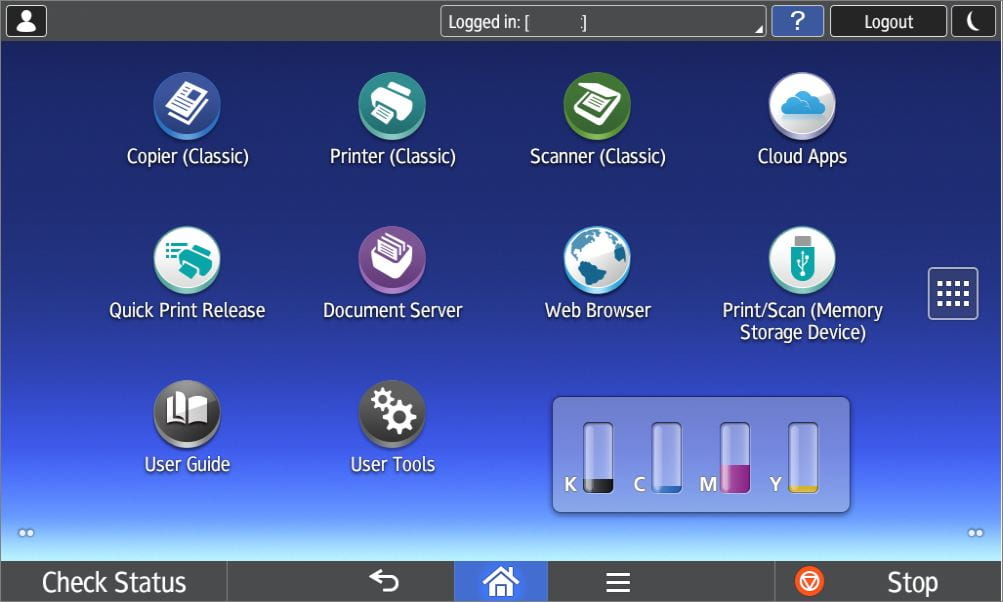
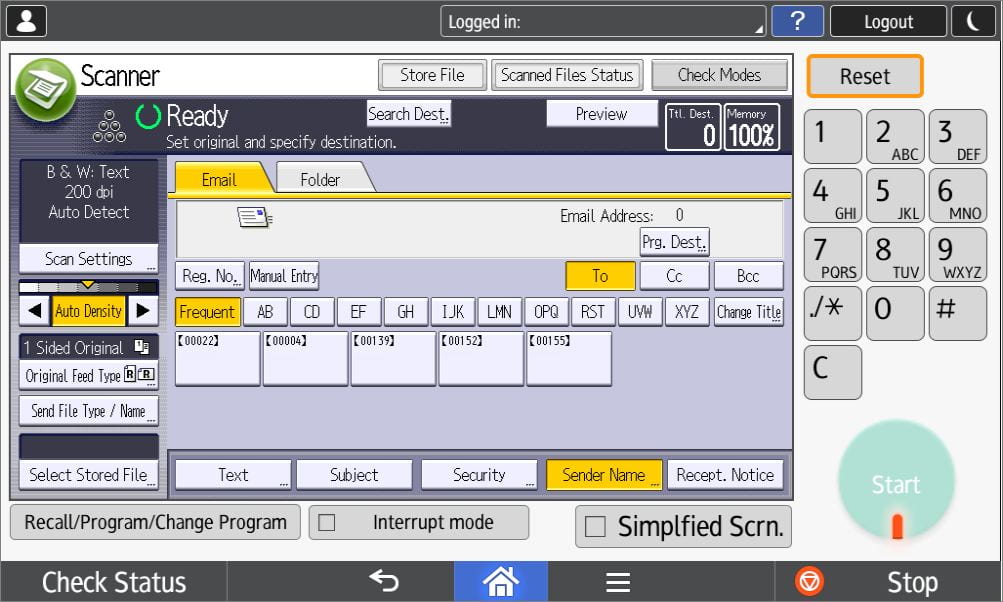
To scan to an email address that is not the address associated with your SHU account, you will need to access the scanning feature under “Device Functions”.
Once logged in to an MFP, tap the “Device Functions” button. The screen will then display a menu of function you can perform on the device. Tap the “Scanner (Classic)” icon to be taken to the document scanning screen. From this screen, enter any email addresses you would like to receive the scanned document.
Once selected, prepare the document for scanning, and tap the OK button to begin scanning. Once all pages have scanned, click the # key on the virtual keyboard to finish scanning and prepare the document to send.
It may take up to 5 minutes depending on the file size for an email to arrive to your email inbox with the document attached.